How to Create Stunning Pieces of Resin Art
Resin art has gained popularity in recent years due to its versatility and the stunning effects it can achieve. Whether you're a beginner or an experienced artist, creating resin art can be a rewarding and fulfilling experience. This guide will provide you with detailed insights, step-by-step implementation, pro tips, and answers to frequently asked questions to help you create stunning pieces of resin art.
Detailed Explanation
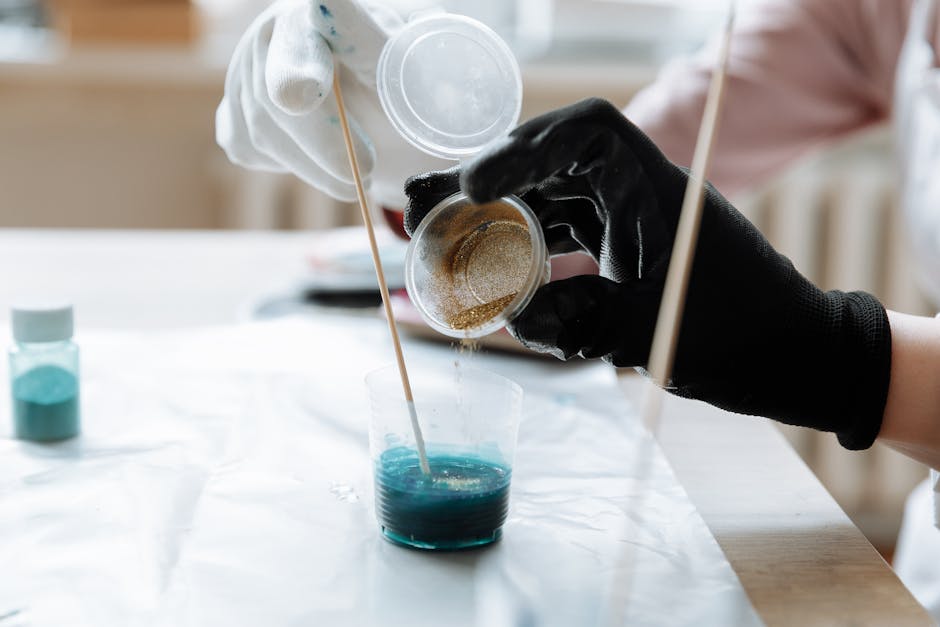
Resin art involves using epoxy resin to create unique and captivating artwork. Epoxy resin is a two-part compound that hardens into a clear, glossy finish, making it ideal for creating a variety of effects. By combining resin with pigments, inks, and other materials, artists can achieve beautiful patterns, textures, and colors in their artwork.
To create resin art, you will need a few essential supplies, including epoxy resin, hardener, mixing cups, stirring sticks, a heat gun or torch, and a surface to work on. It's important to work in a well-ventilated area and wear protective gear, such as gloves and a mask, when working with resin to ensure your safety.
One of the key aspects of resin art is the curing process. Once you have mixed the resin and hardener together, you will need to pour it onto your chosen surface and allow it to cure for the specified time. During this time, you can manipulate the resin using various techniques to create different effects, such as swirling, marbling, or layering colors.
Step-by-Step Implementation
- Prepare your workspace by covering it with a drop cloth or plastic sheet to protect surfaces from spills and drips.
- Measure out the correct ratio of resin and hardener according to the manufacturer's instructions to ensure proper curing.
- Add desired pigments, inks, or other materials to the resin mixture and stir gently to avoid introducing air bubbles.
- Pour the resin onto your surface in a controlled manner, allowing it to spread naturally or using tools to manipulate the flow.
- Use a heat gun or torch to remove any air bubbles that may have formed in the resin and create interesting effects.
Pro Tips and Best Practices
- Work in thin layers to avoid overheating the resin, which can lead to cracking or yellowing.
- Experiment with different techniques, such as adding alcohol inks, acrylic paints, or glitter to create unique effects in your resin art.
- Wait for each layer of resin to cure completely before adding additional layers to prevent mixing or bleeding of colors.
- Protect your finished resin art from direct sunlight and high temperatures to prevent discoloration or warping over time.
- Avoid using too much resin in one area, as it can cause the resin to overflow or create uneven surfaces in your artwork.
Frequently Asked Questions
How long does resin art take to cure?
The curing time for resin art can vary depending on the specific type of resin used, but most epoxy resins cure within 24-72 hours. It's important to follow the manufacturer's instructions for the best results.
Can I use resin art for functional items like coasters or trays?
Yes, epoxy resin is food-safe and heat-resistant once fully cured, making it suitable for creating functional items like coasters, trays, and tabletops. Just ensure you follow proper safety precautions and allow the resin to cure completely before using the items.